AdMob Banner Ads Android Tutorial Android Studio
AdMob Banner Ads are small-sized ads that normally appear bottom of the mobile app. In this lesson, We will learn How to implement this ad efficiently using Android Studio.
Preferred Tools and Language : Android Studio (4 .2 .1), Java , XML
Create a new Android project for AdMob Banner ads implementation demo
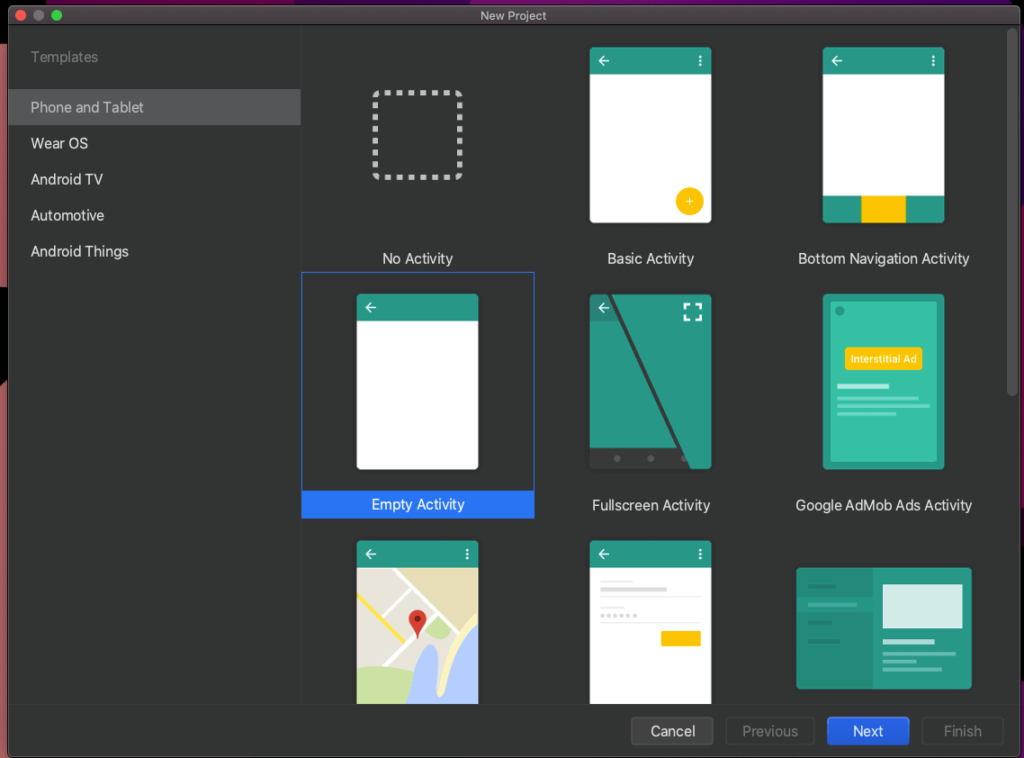
Open the Android Studio and Create new project (From templates > Phone and Tablet > Empty Activity )
Project Name : AdMobBannerAdExample, the project will automatically generate MainActivity.java and a corresponding xml layout (activity_main.xml) file for this java class.
Your mobile app requires an SDK for showing banner ads, so you need to have a dependency inside the Gradle file.
build.gradle(:app)
dependencies {
def sdk_version = "20.1.0"
implementation "com.google.android.gms:play-services-ads:$sdk_version"
}
Sync project
It’s time to design our XML layout
Add the below AdView to activity_main.xml
<com.google.android.gms.ads.AdView
    xmlns:ads="http://schemas.android.com/apk/res-auto"
    android:id="@+id/adView"
    android:layout_width="wrap_content"
    android:layout_height="wrap_content"
    android:layout_centerHorizontal="true"
    android:layout_alignParentBottom="true"
    ads:adSize="BANNER"
    ads:adUnitId="ca-app-pub-3940256099942544/6300978111">
</com.google.android.gms.ads.AdView>
If you observe the layout, the adSize is set to Banner. The given adUnitId used to set the AdMob banner unit id customarily created from the AdMob. ca-app-pub-3940256099942544/6300978111 is a test id for AdMob banner ads debugging.
The final XML layout might look like this: –
activity_main.xml
<?xml version="1.0" encoding="utf-8"?>
<RelativeLayout xmlns:android="http://schemas.android.com/apk/res/android"
    xmlns:app="http://schemas.android.com/apk/res-auto"
    xmlns:tools="http://schemas.android.com/tools"
    android:layout_width="match_parent"
    android:layout_height="match_parent"
    tools:context=".MainActivity">

    <TextView
        android:layout_width="wrap_content"
        android:layout_height="wrap_content"
        android:text="Hello World!"
        app:layout_constraintBottom_toBottomOf="parent"
        app:layout_constraintLeft_toLeftOf="parent"
        app:layout_constraintRight_toRightOf="parent"
        app:layout_constraintTop_toTopOf="parent" />

    <com.google.android.gms.ads.AdView
        xmlns:ads="http://schemas.android.com/apk/res-auto"
        android:id="@+id/adView"
        android:layout_width="wrap_content"
        android:layout_height="wrap_content"
        android:layout_centerHorizontal="true"
        android:layout_alignParentBottom="true"
        ads:adSize="BANNER"
        ads:adUnitId="ca-app-pub-3940256099942544/6300978111">

    </com.google.android.gms.ads.AdView>


</RelativeLayout>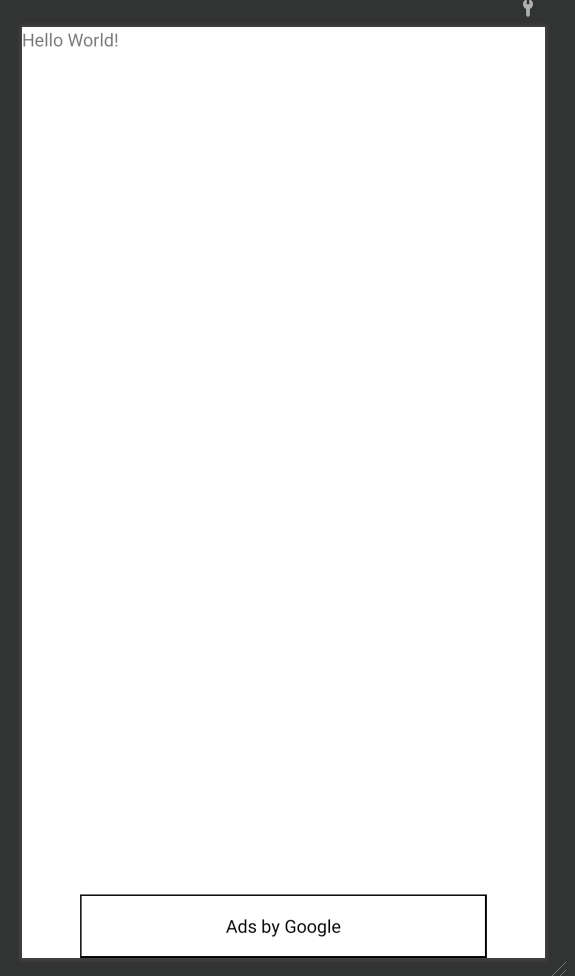
How to use the Banner ad ?
Open up the MainActivity.java file
Create an AdView object and Finally initialise the SDK
private AdView bannerAd; // initialize the sdk
MobileAds.initialize(this, new OnInitializationCompleteListener() {
@Override
public void onInitializationComplete(InitializationStatus initializationStatus) {
}
});How to load banner Ad ?
// adview
bannerAd = findViewById(R.id.adView);
AdRequest adRequest = new AdRequest.Builder().build();
bannerAd.loadAd(adRequest);How to prepare your app for Banner ad testing?
It’s a great idea to test AdMob Banner Ads on real devices. But if you use your real AdMob unit id for testing, that may lead to infliction to your account. So we are going to create a method called “enableTestDevices”
Create a method : enableTestDevices [Optional Step – Recommended]
// for testing
private void enableTestDevices(String[] deviceIds)
{
List<String> list = Arrays.asList(deviceIds);
Log.i("MyIds", Arrays.toString(deviceIds));
MobileAds.setRequestConfiguration(new RequestConfiguration.Builder()
.setTestDeviceIds(list).build());
}You might be wondering, Where Can I find the device Id? Here is the solution. Search inside the verbose.

MainActivity.java
package com.bigknol.example.admobbannerexample;
import androidx.appcompat.app.AppCompatActivity;
import android.os.Bundle;
import android.util.Log;
import com.google.android.gms.ads.AdRequest;
import com.google.android.gms.ads.AdView;
import com.google.android.gms.ads.MobileAds;
import com.google.android.gms.ads.RequestConfiguration;
import com.google.android.gms.ads.initialization.InitializationStatus;
import com.google.android.gms.ads.initialization.OnInitializationCompleteListener;
import java.util.Arrays;
import java.util.List;
public class MainActivity extends AppCompatActivity {
private AdView bannerAd;
private final String[] testDeviceIds = {
"ABCDXXXXXXXXXXXXXXXXXXXXXXXXXXXX",
"ABCDEFGH1XXXXXXXXXXXXXXXXXXXXXXX",
"XCXVXVXVSCFXSFVFDSCDFDSSSSSSSSSS",
};
@Override
protected void onCreate(Bundle savedInstanceState) {
super.onCreate(savedInstanceState);
setContentView(R.layout.activity_main);
 // initialize the sdk
MobileAds.initialize(this, new OnInitializationCompleteListener() {
    @Override
    public void onInitializationComplete(InitializationStatus initializationStatus) {
    }
});
enableTestDevices(testDeviceIds);
// adview
 bannerAd = findViewById(R.id.adView);
 AdRequest adRequest = new AdRequest.Builder().build();
 bannerAd.loadAd(adRequest);
}
// for testing
private void enableTestDevices(String[] deviceIds)
{
    List<String> list = Arrays.asList(deviceIds);
    Log.i("MyIds", Arrays.toString(deviceIds));

    MobileAds.setRequestConfiguration(new RequestConfiguration.Builder()
    .setTestDeviceIds(list).build());
}
}Run App your app
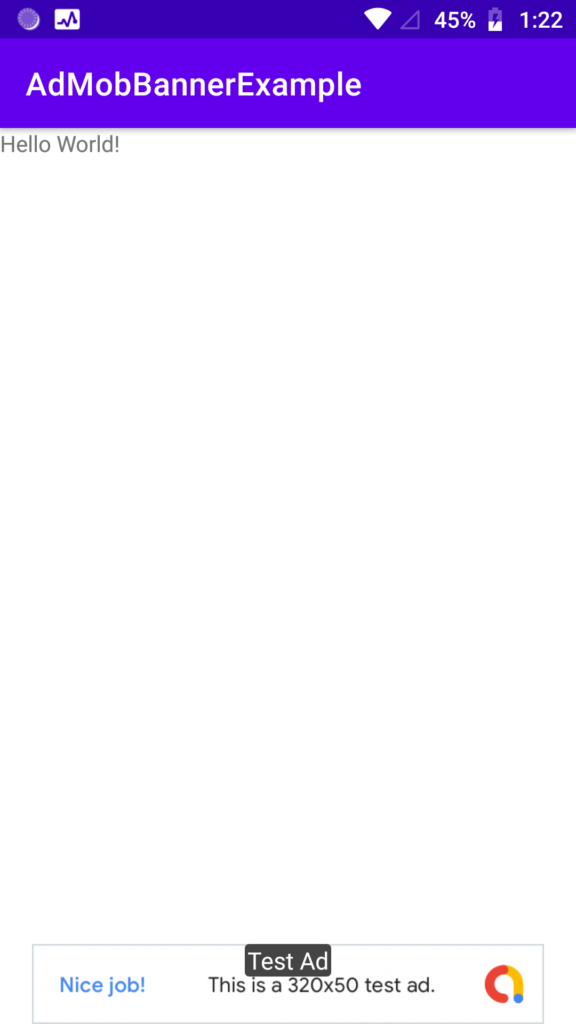
Find other AdMob Tutorials
Note : You don’t need an AdMob account for testing this app. If you have an app in production, you must have a Google’s AdMob account to make money from your app.


