
Google Ad Inspector for Ad Mediation: Android Guide
Google Ad Inspector enhances ad mediation by offering detailed insights into ad placements. It allows you to troubleshoot and optimize your ad inventory across multiple networks like Meta Audience Network, ensuring that your mediation setup performs at its best.

Setting Up Google Ad Inspector
Start by integrating Google Ad Inspector into your app. The inspector is part of the Google Mobile Ads SDK. Make sure you use the latest SDK version to access all features. Once integrated, enable test mode or link your device to the Ad Manager. This step is crucial because Ad Inspector only launches on test or linked devices.
How to use Google Mobile Ads SDK’s Ad Inspector
Launch Google Ad Inspector within your app. Navigate to the troubleshooting section of your mediation configuration. The inspector provides a comprehensive view of your ad requests, impressions, and fill rates across all networks. You can identify issues such as unfilled ad requests or low eCPM (effective cost per thousand impressions) values. Use this data to adjust your mediation strategy.
Step 1: Add the latest version of Mobile Ads SDK
Add the latest version of the Google Mobile Ads SDK to your Android Studio project.
build.gradle(:app)
implementation 'com.google.android.gms:play-services-ads:23.2.0'Add the following permission in AndroidManifest file.
<uses-permission android:name="com.google.android.gms.permission.AD_ID"/>This permission allows your app to access the Google Advertising ID (GAID), which is necessary for AdMob mediation and for targeting ads based on user interests.
MainActivity
Let’s change the MainActivity of your Android Project.
onCreate() :
JAVA
// Log the Mobile Ads SDK version.
        Log.d(TAG, "Google Mobile Ads SDK Version: " + MobileAds.getVersion());
Launch Ad Inspector
MobileAds.openAdInspector(HomeActivity.this, new OnAdInspectorClosedListener() {
    public void onAdInspectorClosed(@Nullable AdInspectorError error) {
        // Error will be non-null if ad inspector closed due to an error.
    }
});
Ad Testing :
List<String> testDeviceIds = Arrays.asList("YOUR-DEVICE-ID");
RequestConfiguration configuration =
        new RequestConfiguration.Builder().setTestDeviceIds(testDeviceIds).build();
MobileAds.setRequestConfiguration(configuration);
KOTLIN
Log.d(TAG, "Google Mobile Ads SDK Version: ${MobileAds.getVersion()}")
MobileAds.openAdInspector(this, OnAdInspectorClosedListener { error ->
    // Error will be non-null if ad inspector closed due to an error.
})
Ad Testing with Kotlin:
val testDeviceIds = listOf("YOUR-DEVICE-ID")
val configuration = RequestConfiguration.Builder()
    .setTestDeviceIds(testDeviceIds)
    .build()
MobileAds.setRequestConfiguration(configuration)
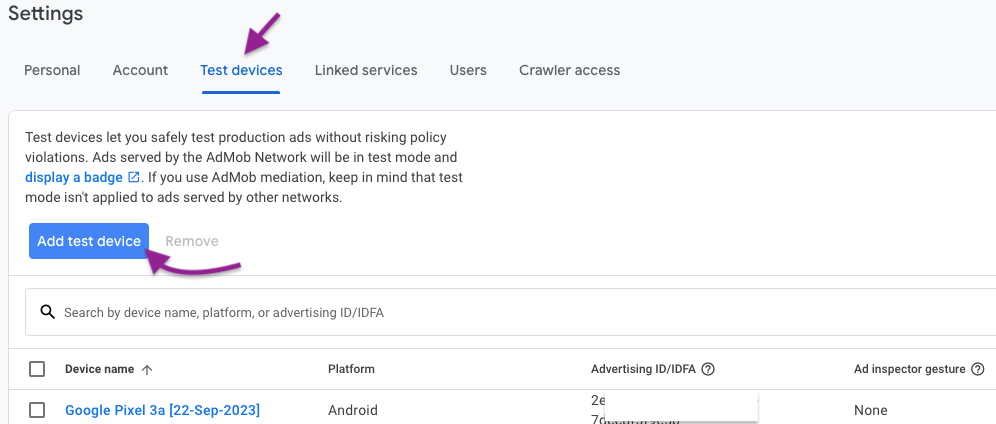
Step 2: Ad Test Devices on AdMob
1. Sign in to your AdMob account at https://apps.admob.com.
2. Click Settings in the sidebar.
3. Click the Test devices tab.
4. Click Add test device.
Enter a device name: Consider using a name that will help you quickly identify your devices in your AdMob account.
Select the platform of your device: Choose Android or iOS. Enter your Advertising ID/IDFA: You can find your Advertising ID (AAID) on Android devices by going to Settings > Google > Ads.
On iOS devices, go to Settings > Privacy > Advertising. Tap on “Reset Advertising Identifier” to generate a new ID.
Select a gesture to use to activate ad inspector: Choose a gesture that you’ll use to activate Ad Inspector on your test device.
You can also choose “None” if you prefer to activate Ad Inspector with an API call.
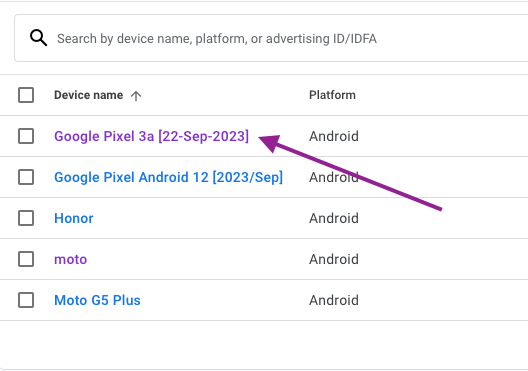
Select any one of the devices available on the list.
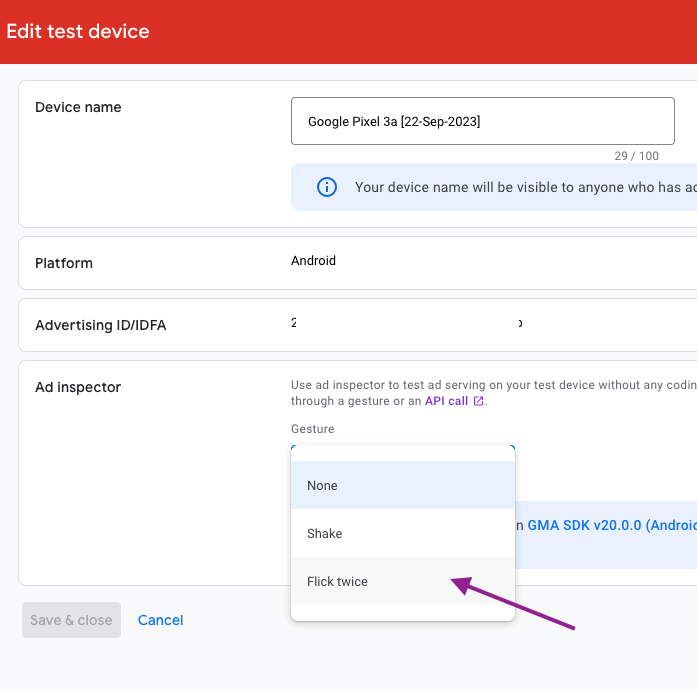
Select ‘Flick twice‘ from the Ad Inspector’s Gesture dropdown. This will activate the Ad Inspector UI when you flick the device twice while the mobile SDK is being initialized.
Step 3: Run your app
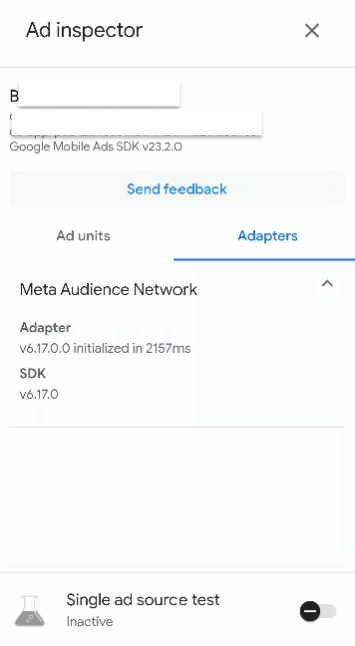
Flick twice to load Ad Inspector UI :
Benefits of Google Ad Inspector
Google Ad Inspector provides real-time diagnostics for your ad mediation. By offering insights into the performance of each ad source, it allows you to make informed decisions. You can optimize network settings, prioritize high-paying ads, and troubleshoot issues before they affect your revenue. The tool also helps you ensure compliance with ad policies, reducing the risk of account suspensions.
Google Ad Inspector is an essential tool for maximizing ad revenue through effective mediation. By offering real-time insights and troubleshooting capabilities, it enables you to fine-tune your ad strategy.
Happy Coding!