
How to create a virtual device in Android Studio
Creating a new virtual device in Android Studio is easy. Before you start, you need to make sure that you have installed the required android tools.
Prerequisites
- SDK Tools 26.1.1 or Higher
- HAXM (Later Recommended)
How to embrace your tools?
Open Android Studio, and click on the SDK Manager icon from the top right of the IDE.

Go to > Appearance & Behavior > System Settings > Android SDK
Make sure that the following tools are installed on your computer.
- Android Emulator
- Android SDK Platform-Tools
- Android SDK Tools

Click on AVD Manager after successfully installed the required tools.

If you observe the below image, you can see the Nexus 5 device is available for use. I’m going to create a new Virtual Device that runs the Android 10 version.
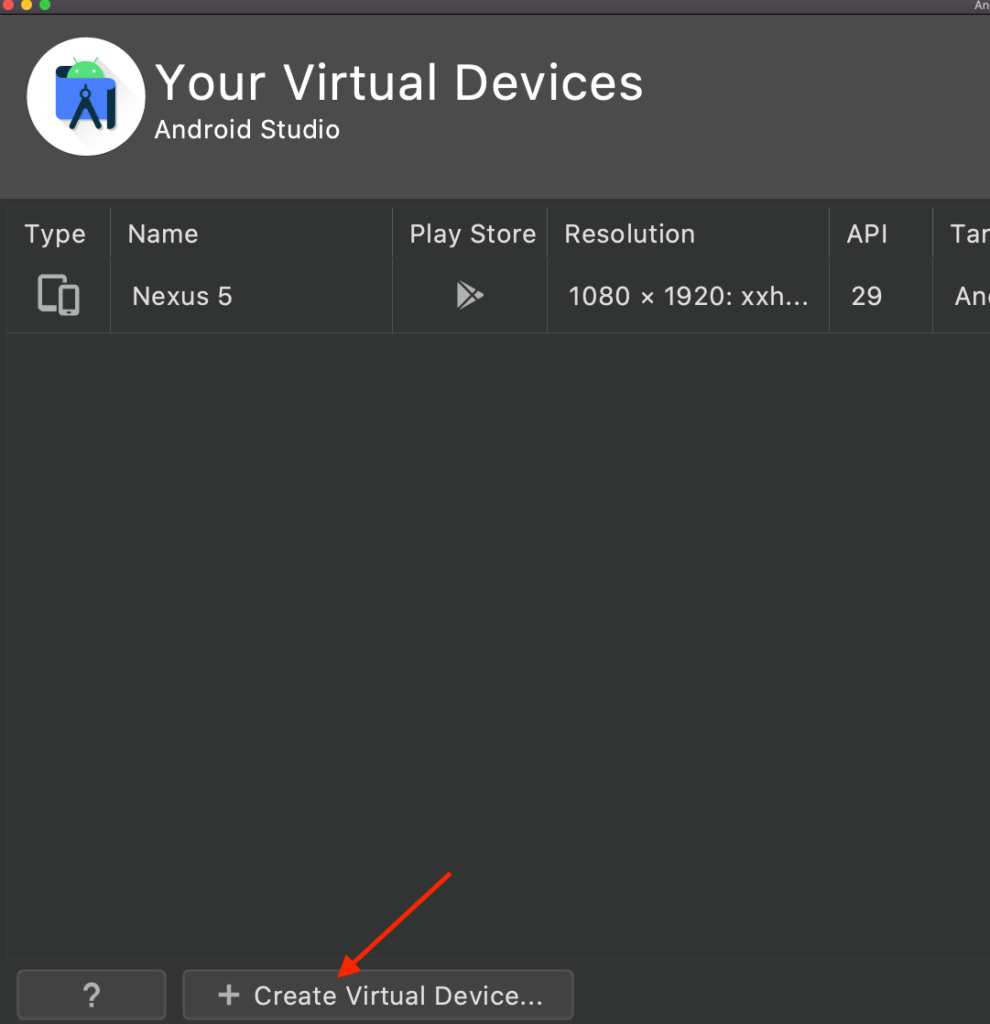
Click “+ Create Virtual Device”
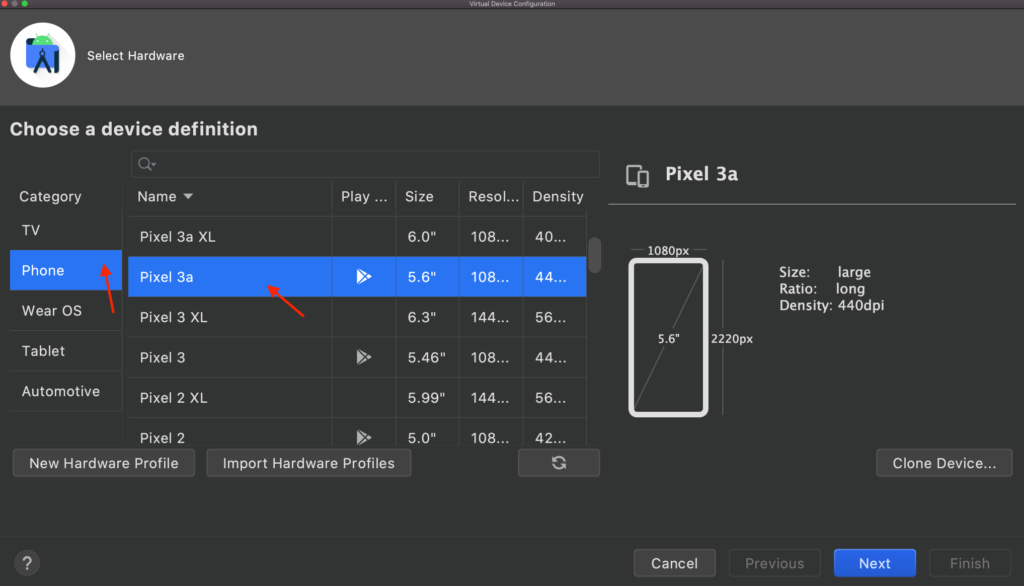
Select Phone, Pixel 3a and Hit the Next button.
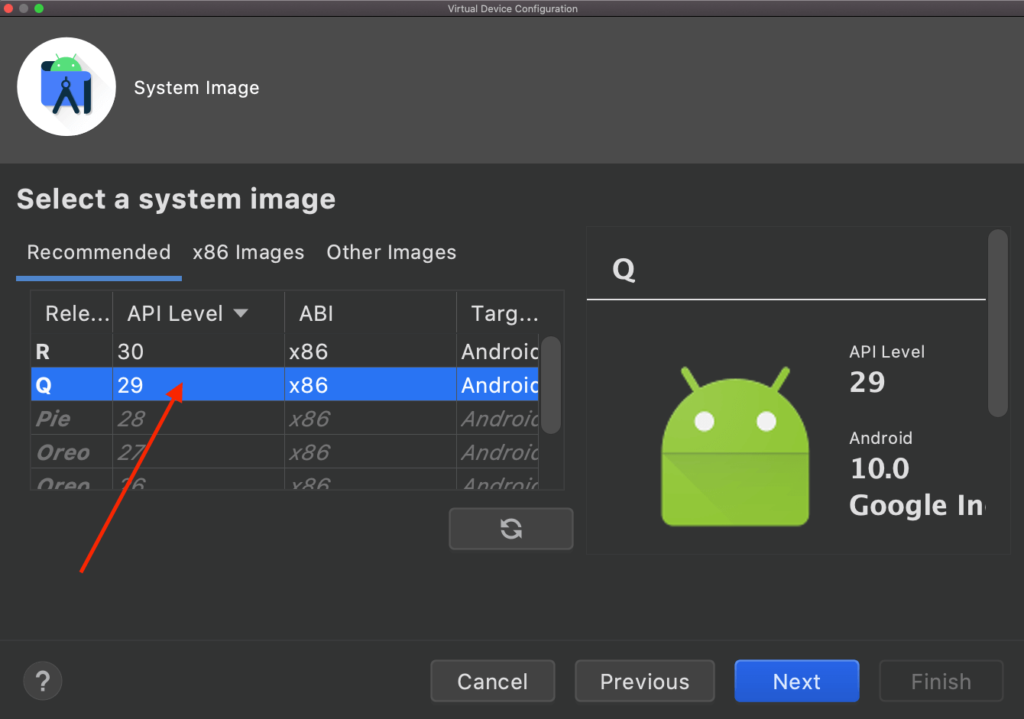
Choose a system image. Here Q 29 is much better for Pixel 3a
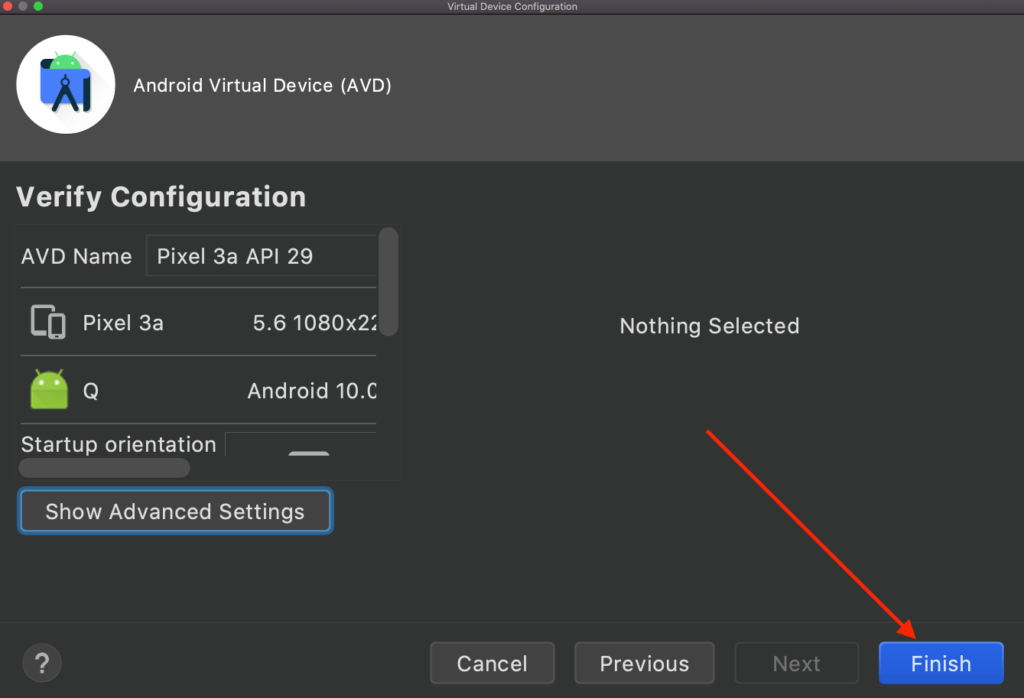
Click on Finish button
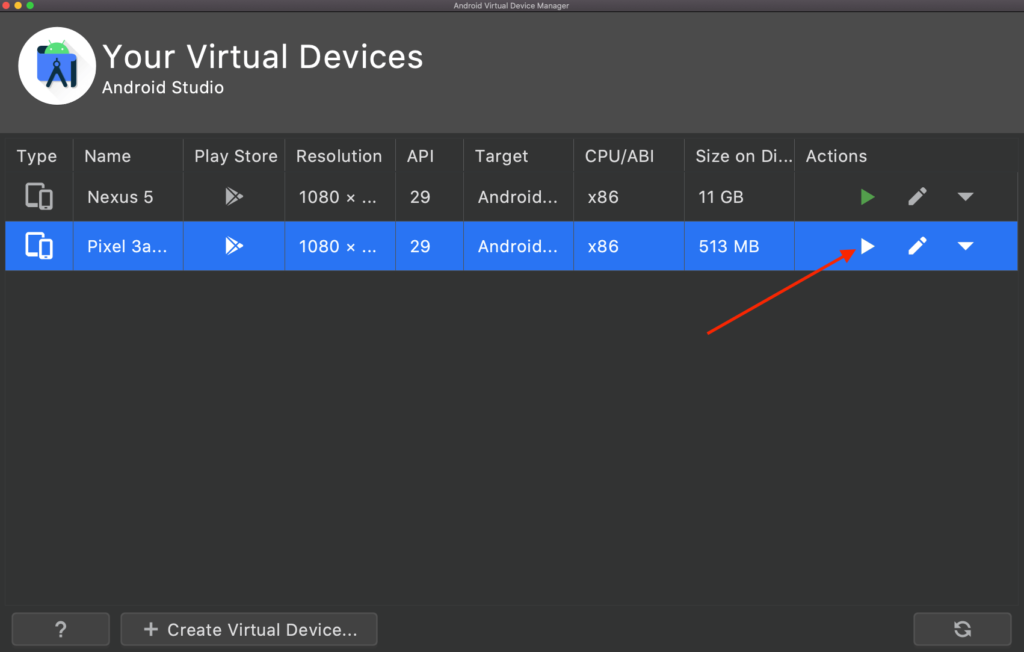
Wow, congratulations, You’ve successfully created a new device for Android App development. Click the play button to launch the emulator.
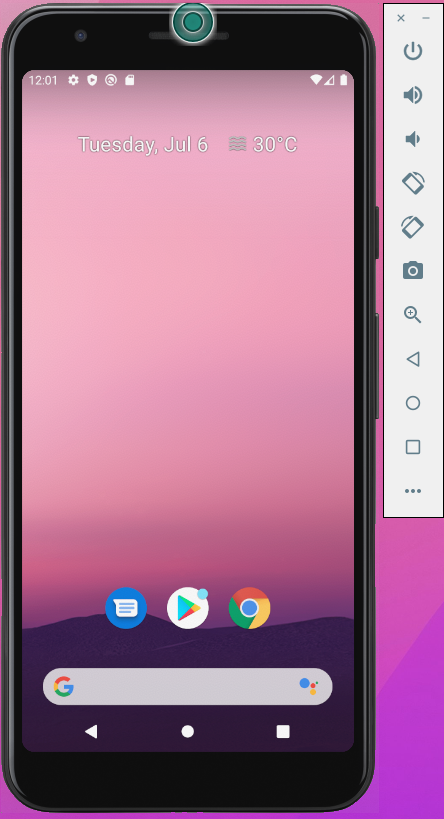
We can use this emulator for testing AdMob ads, Flutter apps and Native apps.