Flutter Animations : Bringing Your Apps to Life
Animations in Flutter can significantly enhance the user experience, making apps more engaging and interactive. This tutorial will guide you though the basics of Flutter animations, providing various examples to help you get started.
Getting Started with Flutter Animations
Before diving into the examples, you need to understand the core concepts of animations in Flutter. Animations in Flutter can be classified into two categories: implicit and explicit animations.

Implicit Animations
Implicit animations automatically handle the animation process for you. These are simple to implement and ideal for straightforward transitions.
Example : AnimatedContainer
import 'package:flutter/material.dart';

void main() => runApp(MyApp());

class MyApp extends StatelessWidget {
  @override
  Widget build(BuildContext context) {
    return MaterialApp(
      home: Scaffold(
        appBar: AppBar(title: Text('Flutter Animations')),
        body: Center(child: AnimatedContainerExample()),
      ),
    );
  }
}

class AnimatedContainerExample extends StatefulWidget {
  @override
  _AnimatedContainerExampleState createState() => _AnimatedContainerExampleState();
}

class _AnimatedContainerExampleState extends State<AnimatedContainerExample> {
  bool _selected = false;

  @override
  Widget build(BuildContext context) {
    return GestureDetector(
      onTap: () {
        setState(() {
          _selected = !_selected;
        });
      },
      child: AnimatedContainer(
        width: _selected ? 200.0 : 100.0,
        height: _selected ? 100.0 : 200.0,
        color: _selected ? Colors.blue : Colors.red,
        alignment: _selected ? Alignment.center : AlignmentDirectional.topCenter,
        duration: Duration(seconds: 2),
        curve: Curves.fastOutSlowIn,
        child: FlutterLogo(size: 75),
      ),
    );
  }
}
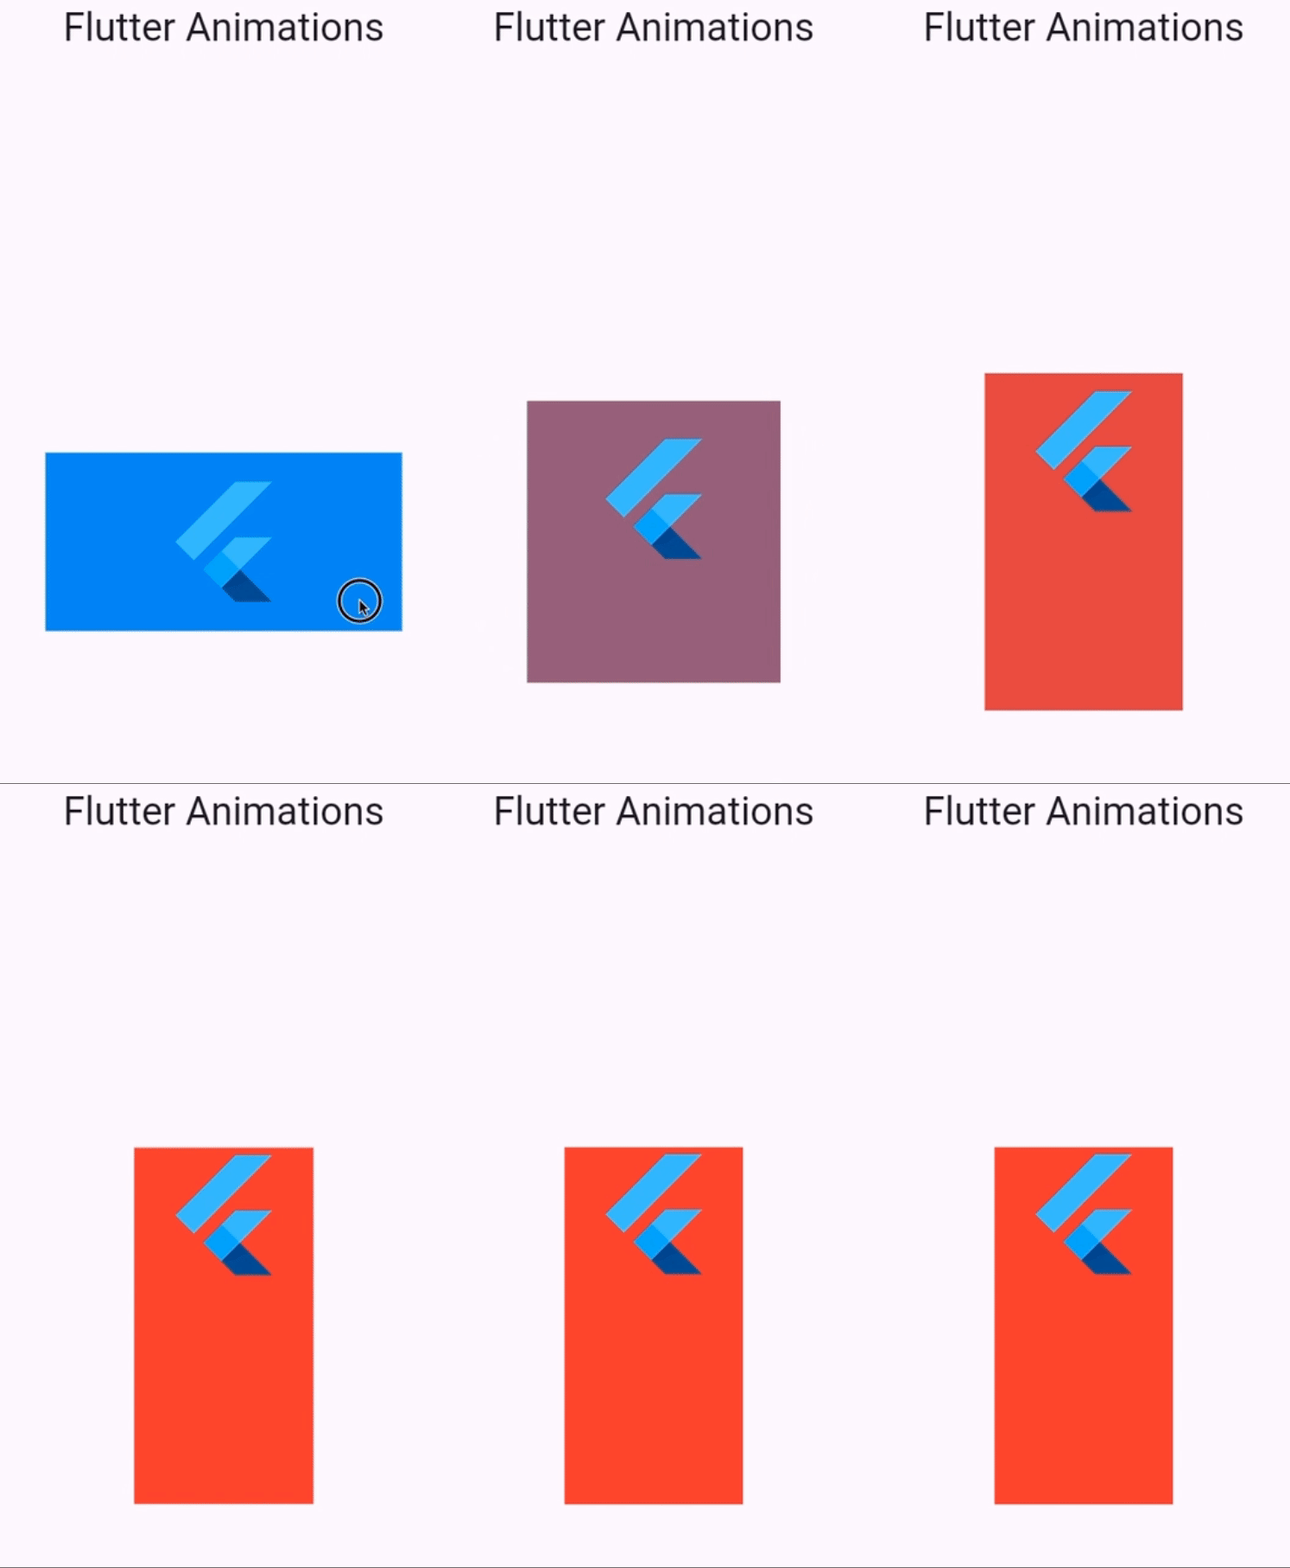
In this example, tapping the container triggers the animation. The container changes its size, color, and alignment smoothly.

Explicit Animations
Explicit animations give you more control over the animation process. Although they require more code, they are essential for complex animations.
Example: AnimatedBuilder
import 'package:flutter/material.dart';

void main() => runApp(MyApp());

class MyApp extends StatelessWidget {
  @override
  Widget build(BuildContext context) {
    return MaterialApp(
      home: Scaffold(
        appBar: AppBar(title: Text('Flutter Animations')),
        body: Center(child: AnimatedBuilderExample()),
      ),
    );
  }
}

class AnimatedBuilderExample extends StatefulWidget {
  @override
  _AnimatedBuilderExampleState createState() => _AnimatedBuilderExampleState();
}

class _AnimatedBuilderExampleState extends State<AnimatedBuilderExample> with SingleTickerProviderStateMixin {
 late  AnimationController _controller;

  @override
  void initState() {
    super.initState();
    _controller = AnimationController(
      duration: const Duration(seconds: 3),
      vsync: this,
    )..repeat(reverse: true);
  }

  @override
  void dispose() {
    _controller.dispose();
    super.dispose();
  }

  @override
  Widget build(BuildContext context) {
    return AnimatedBuilder(
      animation: _controller,
      builder: (context, child) {
        return Transform.rotate(
          angle: _controller.value * 2.0 * 3.141592653589793,
          child: child,
        );
      },
      child: FlutterLogo(size: 100),
    );
  }
}
In this example, an AnimatedBuilder widget animates a FlutterLogo. The logo rotates continuously, creating a smooth spinning effect.
Combining Multiple Animations
You can combine multiple animations to create more complex effects. This approach makes your app’s UI more dynamic and engaging.
Example: AnimationController and Tween
Open DartPad and Write the following code:
import 'package:flutter/material.dart';

void main() => runApp(MyApp());

class MyApp extends StatelessWidget {
  @override
  Widget build(BuildContext context) {
    return MaterialApp(
      home: Scaffold(
        appBar: AppBar(title: Text('Flutter Animations')),
        body: Center(child: MultipleAnimationsExample()),
      ),
    );
  }
}

class MultipleAnimationsExample extends StatefulWidget {
  @override
  _MultipleAnimationsExampleState createState() => _MultipleAnimationsExampleState();
}

class _MultipleAnimationsExampleState extends State<MultipleAnimationsExample> with SingleTickerProviderStateMixin {
  late AnimationController _controller;
  late Animation<Offset> _slideAnimation;
  late Animation<double> _fadeAnimation;

  @override
  void initState() {
    super.initState();
    _controller = AnimationController(
      duration: const Duration(seconds: 2),
      vsync: this,
    );

    _slideAnimation = Tween<Offset>(
      begin: Offset(0, 0),
      end: Offset(1, 0),
    ).animate(_controller);

    _fadeAnimation = Tween<double>(
      begin: 0.0,
      end: 1.0,
    ).animate(_controller);

    _controller.forward();
  }

  @override
  void dispose() {
    _controller.dispose();
    super.dispose();
  }

  @override
  Widget build(BuildContext context) {
    return SlideTransition(
      position: _slideAnimation,
      child: FadeTransition(
        opacity: _fadeAnimation,
        child: FlutterLogo(size: 100),
      ),
    );
  }
}
In this example, the FlutterLogo slides and fades in simultaneously, demonstrating how to combine multiple animations seamlessly.
Advantages and Disadvantages of Flutter Animations
Animations offer several advantages in app development. Firstly, they enhance user experience by providing smooth transitions and visual feedback, making interactions feel more intuitive and engaging.
Animations can also highlight important information, guide users through complex processes, and make applications feel more dynamic and polished.
However, there are some disadvantages to consider. Animations can increase the complexity of the code, making maintenance and debugging more challenging. They may also negatively impact performance, especially on lower-end devices, leading to lag and reduced responsiveness.
Additionally, excessive or poorly implemented animations can distract users and detract from the overall usability of the app. Therefore, it’s crucial to strike a balance, ensuring that animations enhance rather than hinder the user experience.
Verdict
Animations can significantly enhance your app’s user experience. By using implicit animations for simple transitions and explicit animations for more control, you can create a dynamic and engaging interface. Experiment with different animation combinations to make your Flutter app stand out.


