Let’s Build Your First Android App in Kotlin (Android Studio Giraffe)
Android app development can be an exciting journey for beginners. In this tutorial, we will walk you through the process of building your first Android app using Kotlin, a modern and expressive programming language. Kotlin offers a smooth learning curve, making it perfect for beginners like you. Let’s get started and create your very own Android app!
Prerequisites for Building First Android App in Kotlin
1. Basic understanding of programming concepts.
2. Android Studio installed on your computer (download from the official website).
3. A device with Android OS or an Android emulator installed on your computer.
[Read more about Android Prerequisites]

Step 1: Set Up Android Studio (Giraffe)
To begin, download and install Android Studio from the official website (https://developer.android.com/studio). Follow the installation wizard and make sure to install the Android SDK and other necessary components.
Note: You need a good internet connection to download all necessary Android SDK files and tools.
Step 2 : Create a New Android Project
Android development is constantly evolving with new tools and UI development frameworks. You can build an Android app in Jetpack Compose or use Views (Kotlin/Java). In this ‘First Android App Kotlin’ tutorial, we will use Views + XML to create your app.
Let’s open the Android Studio (Giraffe)
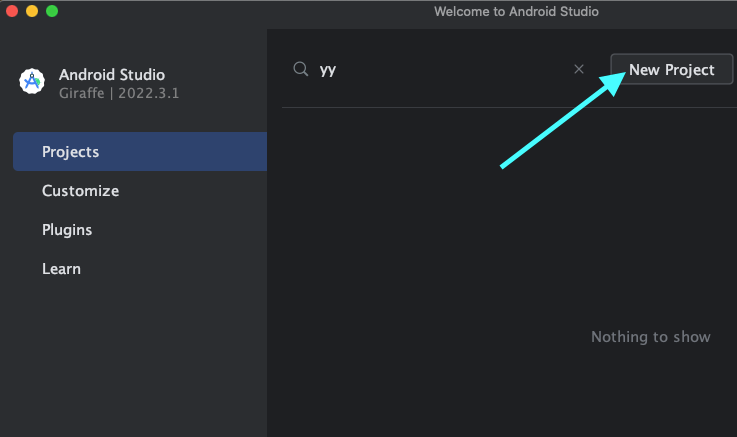
In Projects -> Choose ‘New Project‘
It will generate a new project window for us to enter the details of our first Android app.
Step 3 Name your App and Set location

Fill in the required details, such as the name of your app and the package name (usually in the format “com.example.yourappname”).
1. Name :
Give your app name here. (eg. MyFirstApp)
2. Package name : com.bigknol.myfirstapp

What is Android Package name?
A package name in Android refers to a unique identifier given to your app. It is similar to an address that helps the Android operating system identify and organize your app among all the other apps on a device. The package name is usually written in a specific format like “com.example.yourappname” (Reverse name of your website / app site) and is defined in your app’s manifest file.
Having a unique package name is crucial because it ensures that each app on your device can be distinguished from others, preventing conflicts between different apps. Moreover, it allows developers to publish and update their apps on app stores, like Google Play, without any interference.
3. Save location : This is the location where our project files are stored and updated.
4. Language : Kotlin (We use Kotlin for making this app)
5. Minimum SDK : Android 27 Oreo
The Minimum SDK (Software Development Kit) is the earliest version of the Android operating system that your app supports.
It specifies the lowest Android API level required for your app to run correctly on devices. By setting a minimum SDK, you ensure that your app is compatible with older devices while still taking advantage of newer features on more recent devices.
6. Build configuration language : Kotlin DSL (build.gradle.kts)
The Build configuration language in Android development, specifically the Kotlin DSL, refers to the format used to define the build settings and configuration for an Android project.
The build.gradle.kts file contains configuration blocks and scripts that define various aspects of an Android project, such as dependencies, plugins, version information, compilation settings, and more.
Traditionally, build.gradle files were written in Groovy, which is a dynamic programming language that is powerful but sometimes can lead to complex and verbose configurations.
Now time to hit the ‘Finish‘ button of the Android Studio.
Please wait for the project setup to finish. It may take a few minutes depending on your internet connection.
Change the UI to New UI in Android Studio Giraffe (Optional Step)
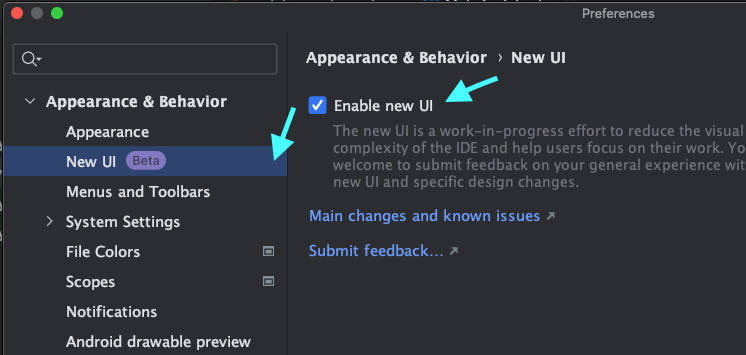
The IDE has introduced a new UI for development, If you like to change the UI, follow the below steps:
- Open Preference / Settings in Android Studio
- Goto Appearance & Behavior -> New UI -> Enabled new UI
Step 4: Familiarize Yourself with the Project Structure
Android Studio generates a basic project structure for you. Familiarize yourself with the main components:
MainActivity.kt
This is the main entry point of your app, where the code execution starts.
activity_main.xml
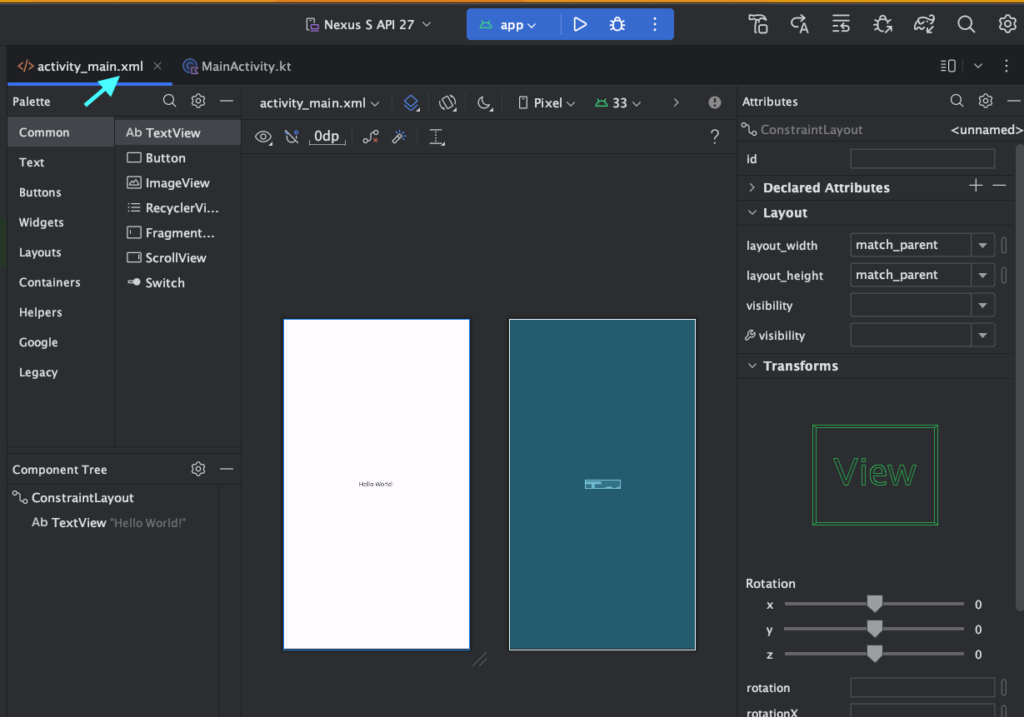
This XML file defines the layout of your app’s main screen.
res folder
res folder: Contains resources like images, layouts, and strings.
Structure of your Android Project :
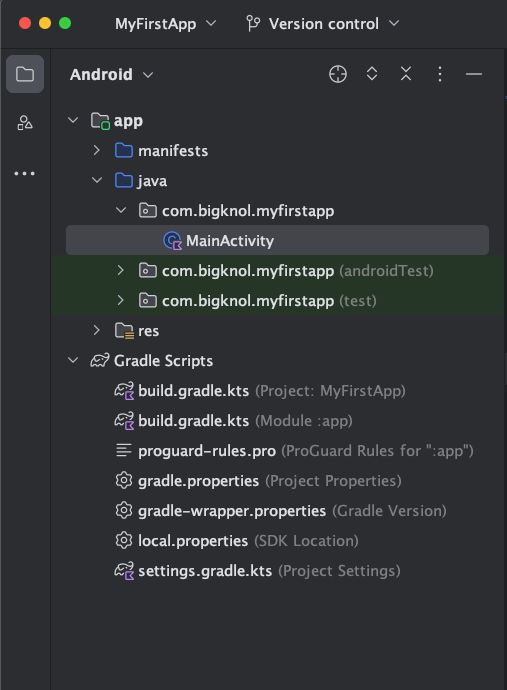
AndroidManifest.xml (Located in app -> manifests)
In Android development, the “AndroidManifest.xml” file, commonly referred to as the manifest, is a crucial configuration file that is present at the root of every Android app project. It includes app information, permissions, Intent filters, etc.
Why is there a Java folder in an Android Kotlin project?
This is because Android projects initially used Java as the primary programming language before Kotlin became an officially supported language for Android development. When Kotlin was introduced, Android developers were given the option to use Kotlin as an alternative to Java.
The presence of the “java” folder in an Android Kotlin project serves a couple of purposes including compatibility and interoperability.
Step 5: First Android App : Design the User Interface
We’re not just building a ‘Hello, World’ app – it’s so much more than that! Pretty funny, huh?
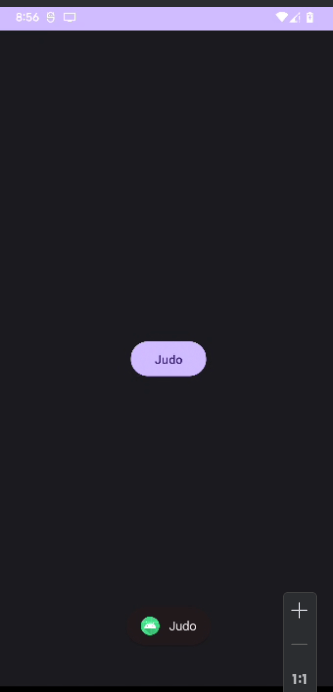
Let’s build a Radom Dog Name App : It’s a simple Android application that has a list of dog names. When the app is launched, it shows a single button on the screen. Each time the button is clicked, a random dog name from the list is displayed on the button. Moreover it shows a tiny message on the screen (In Android world it’s called Toast message)
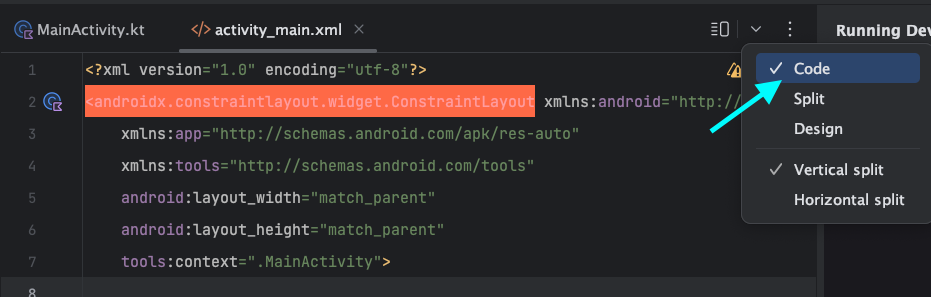
Step 1 : Add a button to our layout (activity_main.xml) You can find this file under App > res > layout > activity_main.xml
Change your layout view to code like below:
Remove the existing TextView from the layout
Add New button or copy and paste the following xml code to your activity_main.xml file.
Final version of activity_main.xml
<?xml version="1.0" encoding="utf-8"?>
<androidx.constraintlayout.widget.ConstraintLayout xmlns:android="http://schemas.android.com/apk/res/android"
    xmlns:app="http://schemas.android.com/apk/res-auto"
    xmlns:tools="http://schemas.android.com/tools"
    android:layout_width="match_parent"
    android:layout_height="match_parent"
    tools:context=".MainActivity">

    <Button
        android:id="@+id/button"
        android:layout_width="wrap_content"
        android:layout_height="wrap_content"
        android:text="Button"
        app:layout_constraintBottom_toBottomOf="parent"
        app:layout_constraintEnd_toEndOf="parent"
        app:layout_constraintStart_toStartOf="parent"
        app:layout_constraintTop_toTopOf="parent" />
</androidx.constraintlayout.widget.ConstraintLayout>
Step 6: Write some real code in Kotlin
Open the MainActivity.kt file
Let’s connect our button to MainActivity.
After this line setContentView(R.layout.activity_main) add the following
val button: Button = findViewById(R.id.button)Here’s a breakdown of the code:
val: It declares a constant variable (cannot be changed once assigned) because of the keyword “val.”
button: This is the name of the variable that we want to create and use to store the button element.
Button: This indicates the data type of the variable “button,” which means it can only store objects of type “Button.” It ensures that the variable can only hold button elements.
findViewById(R.id.button): This part of the code is the method used to find the button element in the user interface (UI). The findViewById method is provided by Android, and it searches for a UI element with the specified ID, which is “button” in this case. (specified in our xml layout : android:id=”@+id/button“)
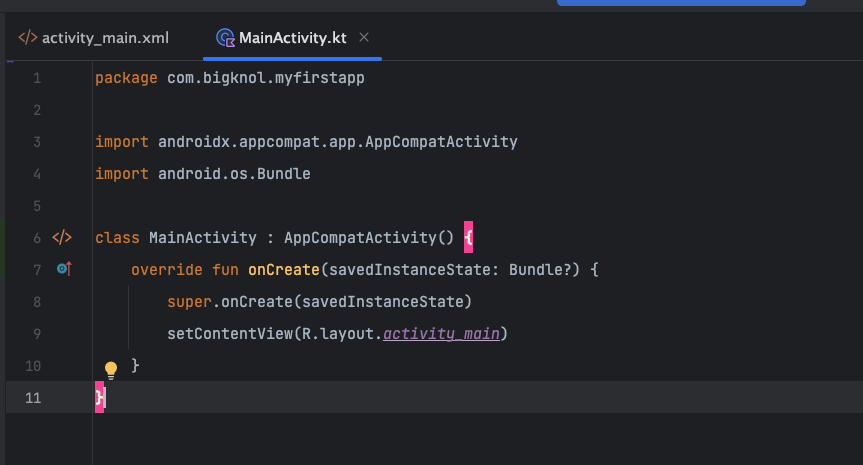
No! Why is my Button in red colour?
Yes, the issue you are facing where the Button class appears in red colour in Android Studio is most likely an import error.
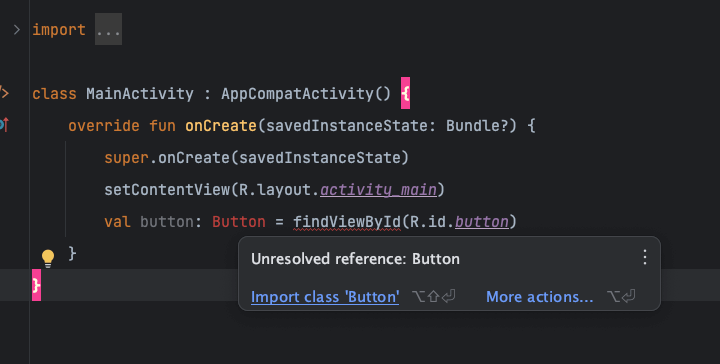
Simply hover over the Button, and you’ll see a small pop-up where you can select “Import class ‘Button'”.
I have many dog names on my paper. How do I store them?
Let’s use Kotlin’s List for storing dog names.
private val list = listOf("Penny", "Bruno", "Jack", "Scala", "Pixxy", "Juno", "Judo")How to get a random name from this list ?
  val index: Int = Random.nextInt(list.size)
            val randomDogName = list[index]
How to set the button click event in Android?
Here is where Kotlin’s lambda shines! In Kotlin, lambda expressions are a concise way to define functions or listeners, often used for handling events like button clicks, as in the case of setOnClickListener for a button.
button.setOnClickListener {
   //write code here
}
Final touch up:
button.setOnClickListener {
            val index: Int = Random.nextInt(list.size)
            val randomDogName = list[index]
            Toast.makeText(this,randomDogName, Toast.LENGTH_SHORT).show()
            button.text = randomDogName
        }
How to Toast something?
It appears as a small popup that appears near the bottom of the screen and automatically disappears after a short duration. Toast messages are often used to provide feedback or show brief notifications to the user without interrupting the current activity or workflow.
Toast.makeText(this, "message", Toast.LENGTH_SHORT).show()Final version of MainActivity.kt
package com.bigknol.myfirstapp

import androidx.appcompat.app.AppCompatActivity
import android.os.Bundle
import android.widget.Button
import android.widget.Toast
import kotlin.random.Random

class MainActivity : AppCompatActivity() {

  private  val list = listOf("Penny", "Bruno", "Jack", "Scala", "Pixxy", "Juno", "Judo")
    override fun onCreate(savedInstanceState: Bundle?) {
        super.onCreate(savedInstanceState)
        setContentView(R.layout.activity_main)
        val button: Button = findViewById(R.id.button)

        button.setOnClickListener {
            val index: Int = Random.nextInt(list.size)
            val randomDogName = list[index]
            Toast.makeText(this,randomDogName, Toast.LENGTH_SHORT).show()
            button.text = randomDogName
        }
    }
}
Step 7: Run your first Android app written in Kotlin
You can use Android emulator or a real device for testing this app.

Congratulations on reading the tutorial and successfully creating a simple Android app in Kotlin! You did an excellent job! Keep up the great work and continue exploring your Android development skills. Well done!
In this tutorial, you learned the basics of building an Android app using Kotlin and Android Studio. You created a simple app with a user interface and added functionality to it using Kotlin code.
Happy Coding!