
AdMob Banner Ads Kotlin Android Studio Implementation
AdMob is one of the most promising ways to monetize your current apps.
The Google service offers a variety of ad formats such as AdMob Banner Ads, Interstitial, App Open, and Reward Interstitial ads.
AdMob Banner Ads : The Kotlin Implementation (Jetpack ViewBinding)
We have discussed the Java Implementation of AdMob Banner Ads, This AdMob tutorial will focus on How to show Banner Ads in your app using Kotlin and the help of ViewBinding.
Let’s create a new Android Project.

Choose Phone and Tablet from Android Templates > Empty Activity
Set your name as ‘Banner Ad’. Finally, make sure that you have selected Kotlin from Language drop down menu.
Initially, the MainActivity.kt might look like this.
package com.bigknol.bannerad

import androidx.appcompat.app.AppCompatActivity
import android.os.Bundle

class MainActivity : AppCompatActivity() {
    override fun onCreate(savedInstanceState: Bundle?) {
        super.onCreate(savedInstanceState)
        setContentView(R.layout.activity_main)
    }
}
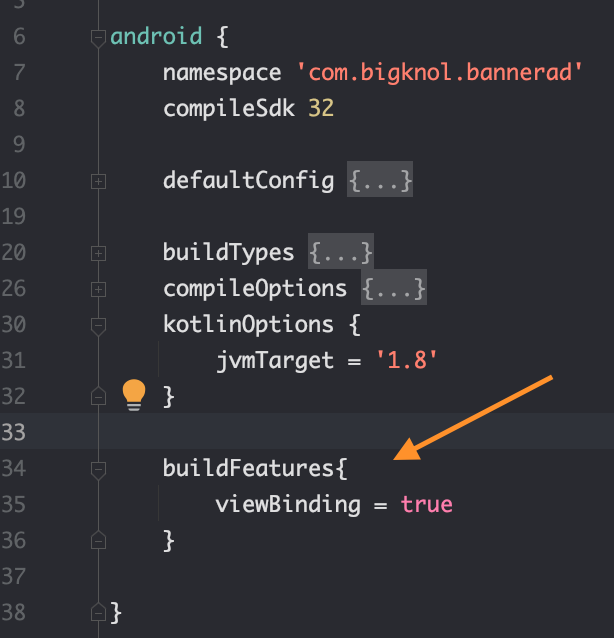
Step 1 Enable ViewBinding in Android Studio
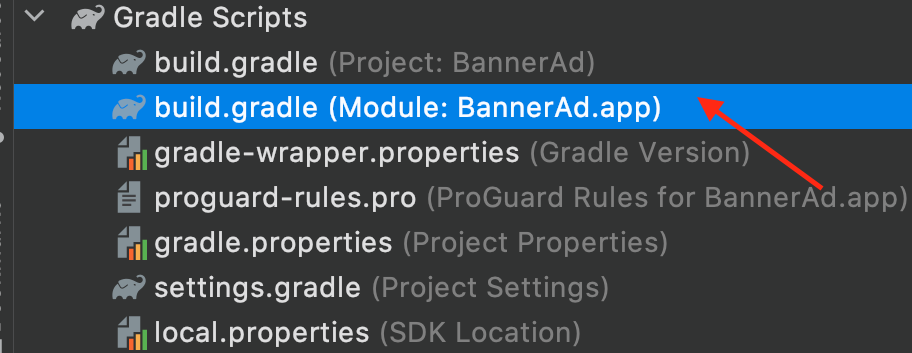
Open the build.gradle(:app) file and add the following lines inside the android section.
buildFeatures{
    viewBinding = true
}
Let’s include the Google Mobile Ads SDK. Open the build.gradle (:app) and head to the dependencies section and finally include the following dependency
implementation 'com.google.android.gms:play-services-ads:21.3.0'Time to Sync the dependencies.
AdMob Banner Ads need App ID
Let’s add the AdMob app ID to the Manifest file. (Here we use a sample AdMob app ID). Make sure that App Id is placed inside the application tag (). Make sure that you have added the real app id from the AdMob account after testing the debug version.
You can skip the following step (if you prefer a banner ad for testing purposes)
You can skip the following step (if you prefer a banner ad for testing purposes)
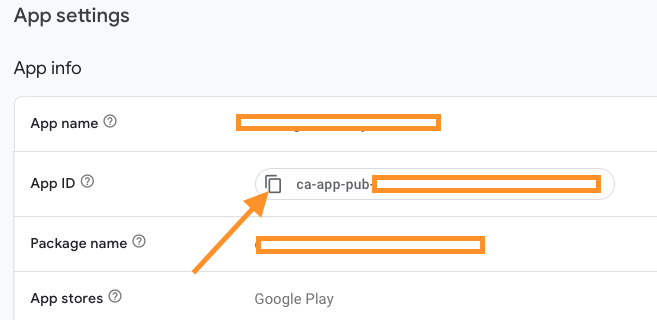
Open the AdMob account, Goto Apps section, and Select the desired app which is used for displaying banner ads.
Click on App Settings then Copy App ID from the right side (The app id starts with ca-app-pub-xxxxxxxxxxxxxxxx~xxxxxxxxxx)

Make sure that App Id is placed under the application tag. (AndroidManifest.xml)
  <meta-data
            android:name="com.google.android.gms.ads.APPLICATION_ID"
            android:value="ca-app-pub-3940256099942544~3347511713"/>
You can see the debug App Id in meta-data.
AndroidManifest.xml
<?xml version="1.0" encoding="utf-8"?>
<manifest xmlns:android="http://schemas.android.com/apk/res/android"
    xmlns:tools="http://schemas.android.com/tools">

    <application
        android:allowBackup="true"
        android:dataExtractionRules="@xml/data_extraction_rules"
        android:fullBackupContent="@xml/backup_rules"
        android:icon="@mipmap/ic_launcher"
        android:label="@string/app_name"
        android:roundIcon="@mipmap/ic_launcher_round"
        android:supportsRtl="true"
        android:theme="@style/Theme.BannerAd"
        tools:targetApi="31">

        <meta-data
            android:name="com.google.android.gms.ads.APPLICATION_ID"
            android:value="ca-app-pub-3940256099942544~3347511713"/>


        <activity
            android:name=".MainActivity"
            android:exported="true">
            <intent-filter>
                <action android:name="android.intent.action.MAIN" />

                <category android:name="android.intent.category.LAUNCHER" />
            </intent-filter>

            <meta-data
                android:name="android.app.lib_name"
                android:value="" />
        </activity>
    </application>

</manifest>
Optional Step
If the app targets the Android 13 version or higher and Google Mobile Ads SDK 20.3 or lower, add the following permission to the Manifest file.
<uses-permission android:name="com.google.android.gms.permission.AD_ID"/>Open MainActivity.kt
Let’s create a binding object and inflate it. You can also replace the current setContentView() call.
lateinit var binding: ActivityMainBindingMainActivity.kt
package com.bigknol.bannerad

import androidx.appcompat.app.AppCompatActivity
import android.os.Bundle
import com.bigknol.bannerad.databinding.ActivityMainBinding


class MainActivity : AppCompatActivity() {

    lateinit var binding: ActivityMainBinding


    override fun onCreate(savedInstanceState: Bundle?) {
        super.onCreate(savedInstanceState)
        binding = ActivityMainBinding.inflate(layoutInflater)
        val view = binding.root
        setContentView(view)
    }
}
Double-click on ActivityMainBinding and press Ctrl+B or CMD +B on Mac, it will open the activity_main.xml file. Remove the textview ‘Hello,World!’ Change the Constraint layout to RelativeLayout.
Add the Banner AdView to activity_main.xml
<com.google.android.gms.ads.AdView
      xmlns:ads="http://schemas.android.com/apk/res-auto"
      android:id="@+id/adView"
      android:layout_width="wrap_content"
      android:layout_height="wrap_content"
      android:layout_centerHorizontal="true"
      android:layout_alignParentBottom="true"
      ads:adSize="BANNER"
      ads:adUnitId="ca-app-pub-3940256099942544/6300978111">
  </com.google.android.gms.ads.AdView>
activity_main.xml (complete)
<?xml version="1.0" encoding="utf-8"?>
<RelativeLayout xmlns:android="http://schemas.android.com/apk/res/android"
    xmlns:tools="http://schemas.android.com/tools"
    android:layout_width="match_parent"
    android:layout_height="match_parent"
    tools:context=".MainActivity">


    <com.google.android.gms.ads.AdView
        xmlns:ads="http://schemas.android.com/apk/res-auto"
        android:id="@+id/adView"
        android:layout_width="wrap_content"
        android:layout_height="wrap_content"
        android:layout_centerHorizontal="true"
        android:layout_alignParentBottom="true"
        ads:adSize="BANNER"
        ads:adUnitId="ca-app-pub-3940256099942544/6300978111">
    </com.google.android.gms.ads.AdView>


</RelativeLayout>
The banner ad will be referenced as adView. Let’s open MainActivity.kt
lateinit var bannerAdView : AdViewLet’s initialise the MobileAds (onCreate())
MobileAds.initialize(this) {}Now time connect our AdView to bannerAdView using view binding
bannerAdView = binding.adViewLet’s make an Ad request.
MobileAds.initialize(this) {}
bannerAdView = binding.adView
val bannerRequest = AdRequest.Builder().build()
bannerAdView.loadAd(bannerRequest)
MainActivity.kt (Complete)
package com.bigknol.bannerad
import androidx.appcompat.app.AppCompatActivity
import android.os.Bundle
import com.bigknol.bannerad.databinding.ActivityMainBinding
import com.google.android.gms.ads.AdRequest
import com.google.android.gms.ads.AdView
import com.google.android.gms.ads.MobileAds
class MainActivity : AppCompatActivity() {
private lateinit var binding: ActivityMainBinding
lateinit var bannerAdView : AdView
override fun onCreate(savedInstanceState: Bundle?) {
super.onCreate(savedInstanceState)
binding = ActivityMainBinding.inflate(layoutInflater)
val view = binding.root
setContentView(view)
MobileAds.initialize(this) {}
bannerAdView = binding.adView
val bannerRequest = AdRequest.Builder().build()
bannerAdView.loadAd(bannerRequest)
}
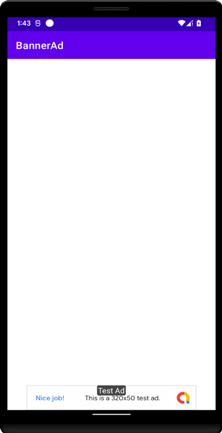
}Run Your App
To Customise the Ad Events, You can use the following snippets
 bannerAdView.adListener = object: AdListener(){
            override fun onAdClicked() {

            }

            override fun onAdClosed() {

            }

            override fun onAdFailedToLoad(adError : LoadAdError) {

            }

            override fun onAdImpression() {

            }

            override fun onAdLoaded() {

            }

            override fun onAdOpened() {

            }
        }

